Sunday, July 17, 2022

Universal Embroidery Clip Frame Review - Did I like it?

 When I started Cross Stitching again, I had such a struggle holding the hoop and seeing the holes.  Many of you in my age group (eye roll here) have found the same.  I am planning to review one item that seemed to help me.

The Lzttyee Universal Clip Frame that I bought on Amazon. 

 Let me tell you how I chose it.

I have watched numerous Flosstube videos where ladies have a Lap Stand that clamps to their hoop.  I thought that might make it easier for me if I don't need to hold the hoop.  They are beautiful but not in my price range at this time, so I saw this one and showed my husband saying, "This may help me and it's just over $20".  He immediately said, "Buy it!"  So I did, and here is how I like it and what I learned.

It came quickly in a tidy package, but there are no instructions in the bag for putting it together.  So I went back to Amazon and peered at this photo to see how to assemble it:


Good.  Assembled and ready.  In the reviews there were a few complaints that removing the aida, the sharp clamp tore the fabric.  Having read that, I decided I would use a pattern I have and not so expensive aida (from Hobby Lobby).  Also, I added fabric strips between my fabric and the clamp.

I did forget to add it on the bottom clamp.  (oops)  

My son came and solved the sharp clamp problem.  He simply took the clamps outside and rubbed them on the concrete to curve them off.  They work great now, even though I still keep the fabric on as a protection.  

I finished the project that was set up on that frame:

It is "China Blue" from the magazine:

Ultimate Cross Stitch, East Asia Vol 25 2020  ↩ that should take you there.

And started a new one:

All in all, I give this frame a 👍Thumbs up!

Let me know if this frame works for you.  Some can't reach across and under it well, but I stitch on it with two hands, dominant one under and other on top, so that's not a problem with me. 
 I did make a YouTube video and hopefully you can see it here:


Thank you for visiting my Sewing Room and I hope you come back!
 🪡🧵


Wednesday, February 9, 2022

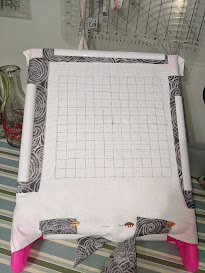
Gridding, Hoops and Frames, Oh MY!

     Counted Cross Stitch!  Who knew there were so many ways to begin!  What fabric, what hoop, how big, do I grid?  So many decisions.  

    I love to grid!  No, that's not right.  I love to cross stitch on gridded fabric.  So how do I grid?  My way is a bit controversial.  I use a pen called a Frixion ball Clicker by Pilot.  They come in many colors and roll on easily.  I'll try to link it. (forgive my fumbling, new at this)

I've used it for years, since I first heard of it about 10 years ago and it has worked great!  The controversy? This pen is erasable on fabric by ironing it.  It just disappears.  The problem?  When the fabric gets cold, the ink reappears.  

    Let me say, I have never had it reappear.  The only time I had a problem was when I made an apron pattern and drew out all the extra lines and directions with my purple Frixion pen.  When I went to reuse the pattern, the paper was wrinkled so I ironed it out to lay on my fabric.  Ooops.  The writing and marking all disappeared.  At the time I didn't think to put it in the freezer to help it reappear, so I just wrote everything out again - with a traditional pen. I have used it in garment making, quilt making and even though I have worn that blouse or skirt in the winter, I've never had a mark show up.  Perhaps on the inside but I haven't noticed. 


     When I grid, I lay out my aida and locate the center of the fabric and the center of the design.  The design I was laying out in the picture did start the grid from the center. They don't always. I drew my first two lines with the Frixion pen from the center Vertical and Horizontal, counting 10 squares each way and making a mark at each 10 from the center on both lines.  I continued my lines to the amount of the graph I was using.  When you use the pen, it's pretty easy to count as your pen bumps along in each hole.  If you are using linen and stitching over 2, just count 20 instead of 10.  Go slow, count twice, and once these two lines are marked accurately, you shouldn't have to count again except occasionally to double check that you haven't gotten off the line.  Draw out all your lines then you are ready to hoop!

    I did a little experiment because some have worried if their completed project gets cold, will the lines come back.  Generally that's not an issue unless you are driving in very cold weather to deliver your framed gift.  So, I put my finished project in the freezer.  Yes the lines came back, though not as vibrantly.  Then I thought that, if it were framed I couldn't iron it or use hot water on it, so I used a hair dryer.  The lines disappeared quickly and stayed off.  

    Here is the piece I practiced with:


Here it is completed and ironed ready to frame:


After the freezer you can see the lines reappeared:

I used the Hair Dryer and as soon as it got warm, it barely had to blow on the piece and the lines disappeared again!

So in my experience, it's much easier to grid with the Frixion pen than thread or fish line (yes, I've done that).  Just remember when ironing your piece, put it face down on a terrycloth towel so you won't smash your stitches.


Universal Embroidery Clip Frame Review - Did I like it?

  When I started Cross Stitching again, I had such a struggle holding the hoop and seeing the holes.  Many of you in my age group (eye roll ...